Bibliographic Record Merging and Overlay

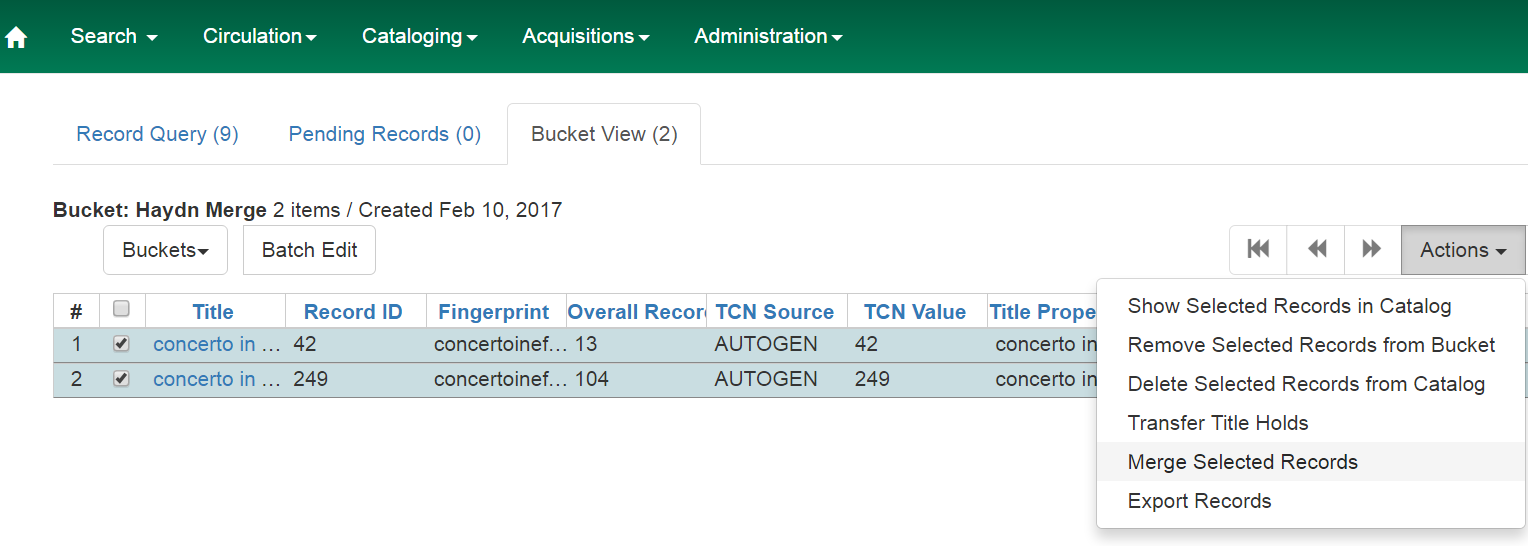
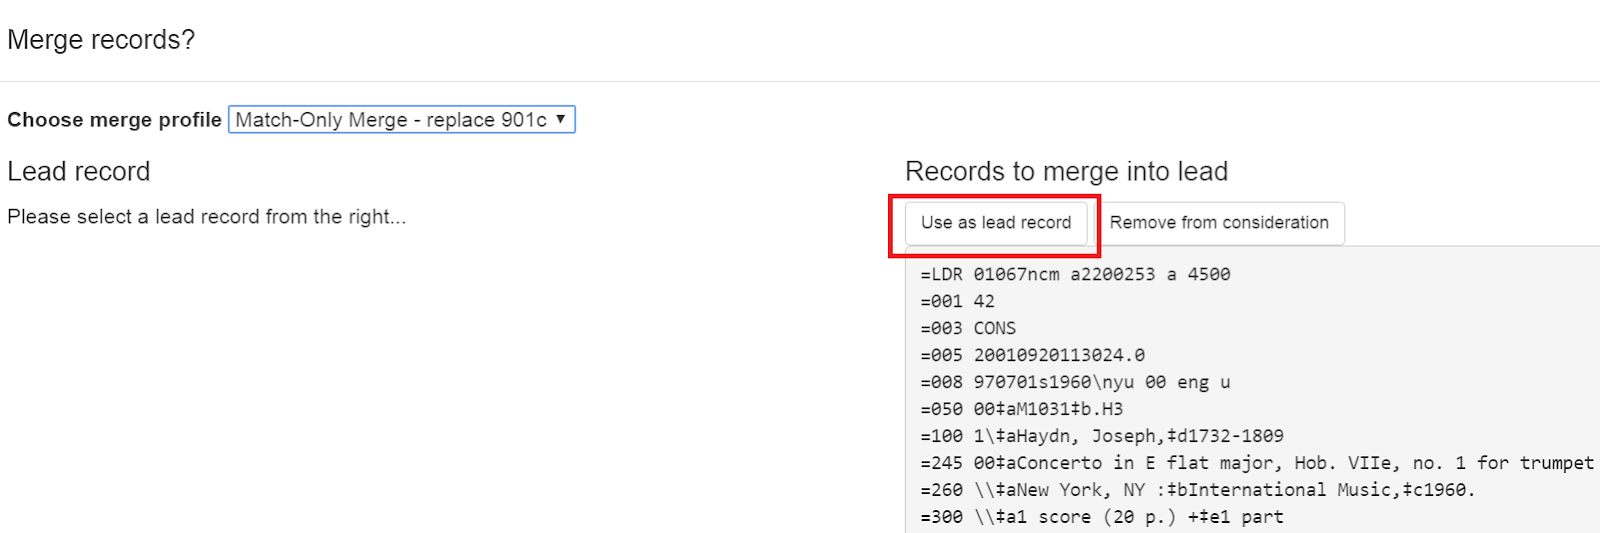
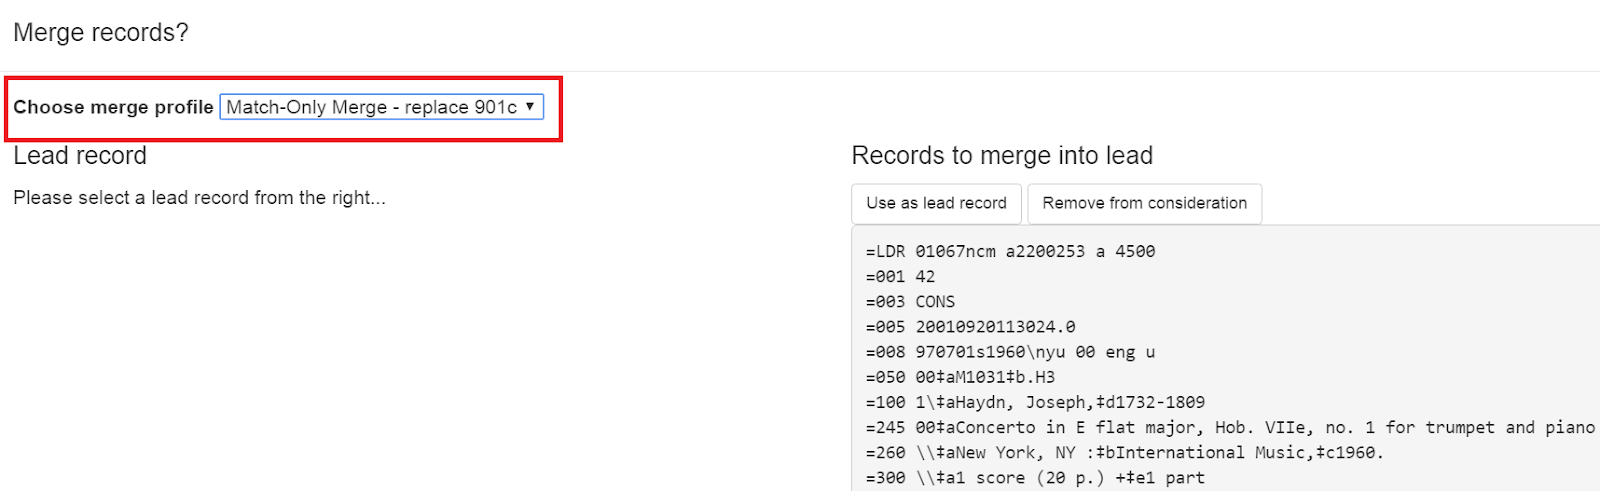
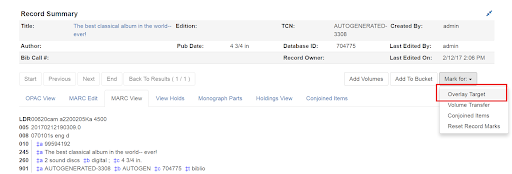
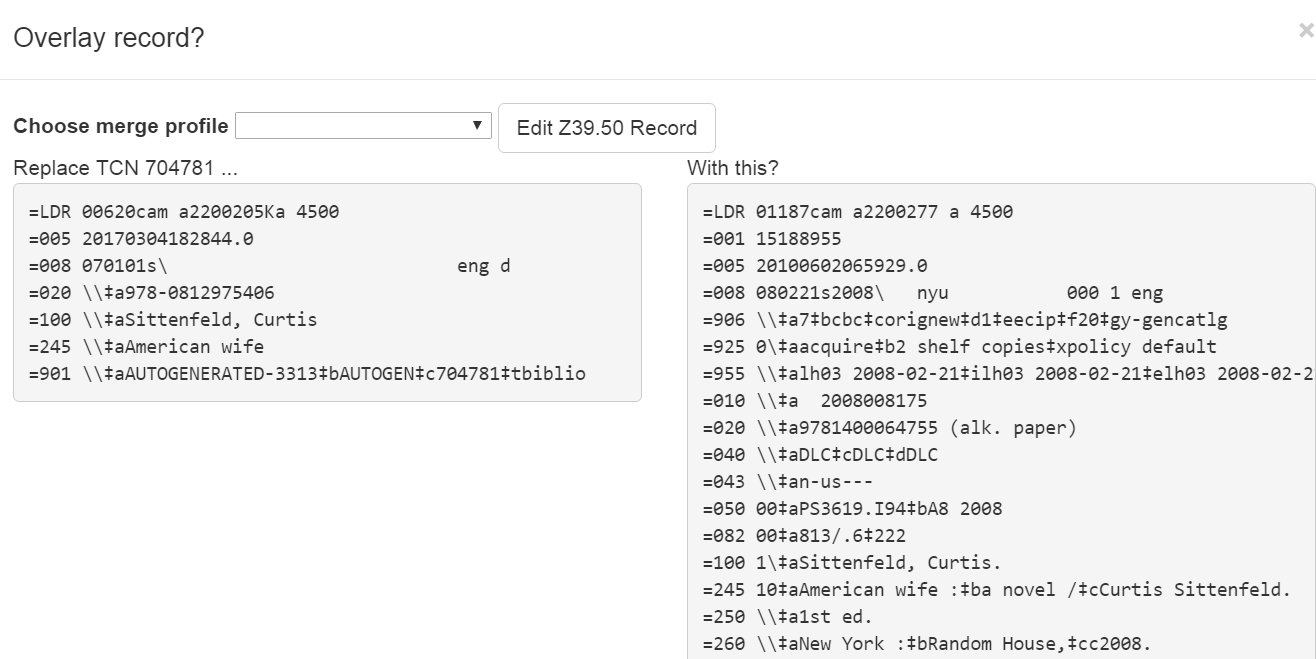
Catalogers can merge or overlay records in record buckets or using records obtained from a Z39.50 service.

Merge Records in Record Buckets

  1. Click Cataloging>Record Buckets.
  2. Create and/or select a record bucket.
  3. Select the records that you want to merge, and click Actions>Merge Selected Records.
media/marcoverlay1.png
  1. The Merge Selected Records interface appears.
  2. The records to be merged appear on the right side of the screen. Click Use as Lead Record to select a lead record from those that need to be merged.
media/marcoverlay2.png
  1. Select a merge profile from the drop down box.
media/marcoverlay3.png
  1. After you select the profile, you can preview the changes that will be made to the record.
media/marcoverlay4.png
  1. You can change the merge profile at any time; after doing so, the result of the merge will be recalculated. The merge result will also be recalculated after editing the lead record, changing which record is to be used as lead, or removing a record from consideration.
  2. When you are satisfied that you have selected the correct merge profile, click the Merge button in the bottom right corner.
  3. Note that merge profiles that contain a preserve field specification are not available to be chosen in this interface, as they would have the effect of reversing which bibliographic record is considered the target of the merge.

Track Record Merges

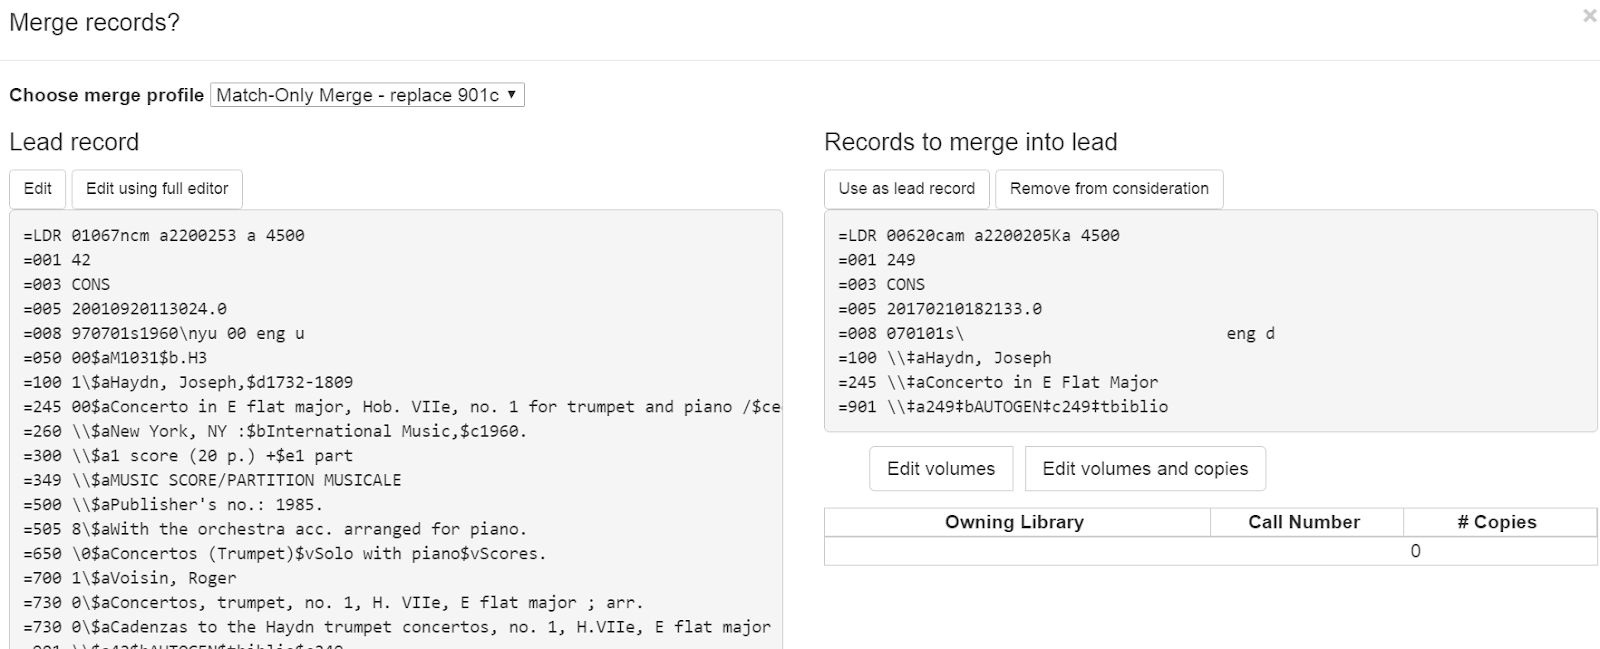
When 2 or more bib records are merged in a record bucket, all records involved are stamped with a new merge_date value. For any bib record, this field indicates the last time it was involved in a merge. At the same time, all subordinate records (i.e. those deleted as a product of the merge) are stamped with a merged_to value indicating which bib record the source record was merged with.

In the browser client bib record display, a warning alert now appears along the top of the page (below the Deleted alert) indicating when a record was used in a merge, when it was merged, and which record it was merge with, rendered as a link to the target record.

merge message with date

Merge Records Using Z39.50

  1. Search for a record in the catalog that you want to overlay.
  2. Select the record, and click MARC View.
  3. Select Mark for: Overlay Target.
media/marcoverlay5.png
  1. Click Cataloging>Import Record from Z39.50.
  2. Search for the lead record that you want to overlay within the Z39.50 interface.
  3. Select the desired record, and click Overlay.
media/marcoverlay6.png
  1. The record that you have targeted to be overlaid, and the new record, appear side by side.
media/marcoverlay7.png
  1. You can edit the lead record before you overlay the target. To edit the record, click the Edit Z39.50 Record button above the lead record.
  2. The MARC editor will appear. You can make your changes in the MARC editor, or you can select the Flat Text Editor to make changes. After you have edited the record, click Modify in the top right corner, and then Use Edits in the bottom right corner. Note that the record you are editing is the version from the Z39.50 server not including any changes that would be made as a result of applying the selected merge file.
  3. You will return to the side-by-side comparison of the records and then can proceed with the overlay.
  4. Once you are satisfied with the record that you want to overlay, select a merge profile from the drop down box, Choose merge profile.
  5. Click Overlay. The overlay will occur, and you will be taken back to the Z39.50 interface.
  6. Note that the staff client remembers the last merge overlay profile that you selected, so the next time that you open the interface, it will default to that profile. Simply change the profile to make a different selection.
  7. Also note when the merge profile is applied, the Z39.50 record acts as the target of the merge. For example, if your merge profile adds 650 fields, those 650 fields are brought over from the record that already exists in the Evergreen database (i.e., the one that you are overlaying from Z39.50).
  8. Also note that merge profiles that contain a preserve field specification are not available to be chosen in this interface, as they would have the effect of reversing which bibliographic record is considered the target of the merge.

New Admin Settings

  1. Go to Admin>Local Administration>Library Settings Editor>Upload Default Merge Profile (Z39.50 and Record Buckets).
  2. Select a default merge profile, and click Update Setting. The merge profiles that appear in this drop down box are those that are created in MARC Batch Import/Export. Note that catalogers will only see merge profiles that are allowed by their org unit and permissions.