Chapter 27. Import Records

The Import Records interface incorporates record match sets, quality metrics, more merging options, and improved ways to manage your queue. In this example, we will import a batch of records. One of the records in the queue will contain a matching record in the catalog that is of lower quality than the incoming record. We will import the record according to the guidelines set by our record match set, quality metrics, and merge/overlay choices that we will select.

  1. Select a Record Type from the drop down menu.
  2. Create a queue to which you can upload your records, or add you records to an existing queue. Queues are linked to match sets and a holdings import profile. You cannot change a holdings import or record match set for a queue.
  3. Select a Record Match Set from the drop down menu.
  4. Select a Holdings Import Profile if you want to import holdings that are attached to your records.
  5. Select a Record Source from the drop down menu.
  6. Select a Merge Profile. Merge profiles enable you to specify which tags should be removed or preserved in incoming records.
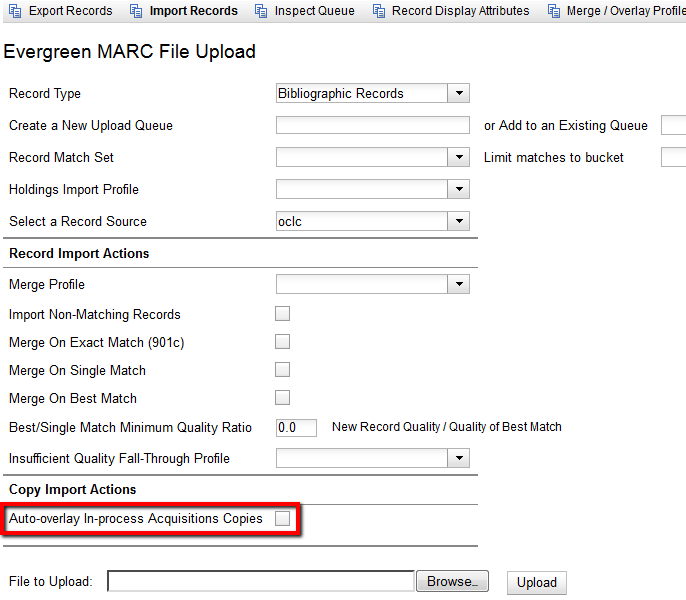
  7. Choose one of the following import options if you want to auto-import records:

    1. Merge on Single Match - Using the Record Match Set, Evergreen will only attempt to perform the merge/overlay action if only one match was found in the catalog.
    2. Merge on Best Match - If more than one match is found in the catalog for a given record, Evergreen will attempt to perform the merge/overlay action with the best match as defined by the match score and quality metric.

      Note

      Quality ratio affects only the Merge on Single Match and Merge on Best Match options.

  8. Enter a Best/Single Match Minimum Quality Ratio. Divide the incoming record quality score by the record quality score of the best match that might exist in the catalog. By default, Evergreen will assign any record a quality score of 1 (one). If you want to ensure that the inbound record is only imported when it has a higher quality than the best match, then you must enter a ratio that is higher than 1. For example, if you want the incoming record to have twice the quality of an existing record, then you should enter a 2 (two) in this field. If you want to bypass all quality restraints, enter a 0 (zero) in this field.
  9. Select an Insufficient Quality Fall-Through Profile if desired. This field enables you to indicate that if the inbound record does not meet the configured quality standards, then you may still import the record using an alternate merge profile. This field is typically used for selecting a merge profile that allows the user to import holdings attached to a lower quality record without replacing the existing (target) record with the incoming record. This field is optional.
  10. Under Copy Import Actions, choose Auto-overlay In-process Acquisitions Copies if you want to overlay temporary copies that were created by the Acquisitions module. The system will attempt to overlay copies that:

    • have associated lineitem details (that is, they were created by the acquisitions process),
    • that lineitem detail has the same owning_lib as the incoming copy’s owning_lib, and
    • the current copy associated with that lineitem detail is In process.
  11. Browse to find the appropriate file, and click Upload. The file will be uploaded to a queue. The file can be in either MARC or MARCXML format.

    Batch Importing MARC Records
  12. The screen will display records that have been uploaded to your queue. Above the table there are three sections:

    • Queue Actions lists common actions for this queue. Export Non-Imported Records will export a MARC file of records that failed to import, allowing those records to be edited as needed and imported separately. (Those records can be viewed by clicking the Limit to Non-Imported Records filter.)
    • Queue Summary shows a brief summary of the records included in the queue.
    • Queue Filters provides options for limiting which records display in the table.

      Batch_Importing_MARC_Records15
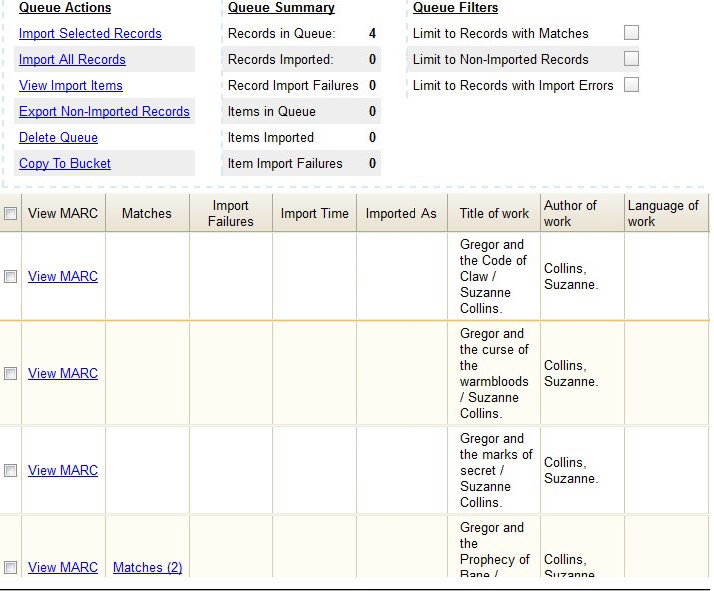
  13. If Evergreen indicates that matching records exist, then click the Matches link to view the matching records. Check the box adjacent to the existing record that you want to merge with the incoming record.

    Batch_Importing_MARC_Records10
  14. Click Back to Import Queue.
  15. Check the boxes of the records that you want to import, and click Import Selected Records, or click Import All Records.
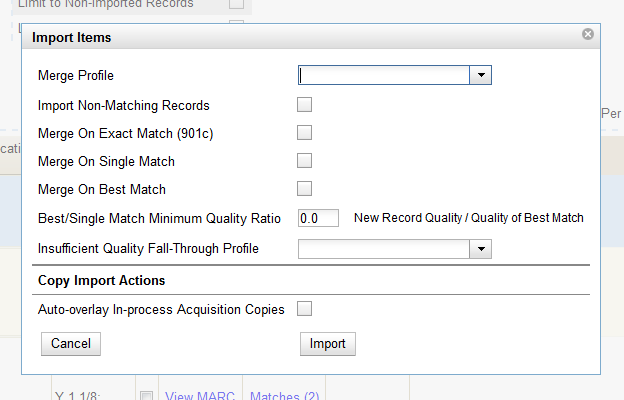
  16. A pop up window will offer you the same import choices that were present on the Import Records screen. You can choose one of the import options, or click Import.

    Batch Importing MARC Records Popup
  17. The screen will refresh. The Queue Summary indicates that the record was imported. The Import Time column records the date that the record was imported. Also, the Imported As column should now display the database ID (also known as the bib record number) for the imported record.

    Batch_Importing_MARC_Records12
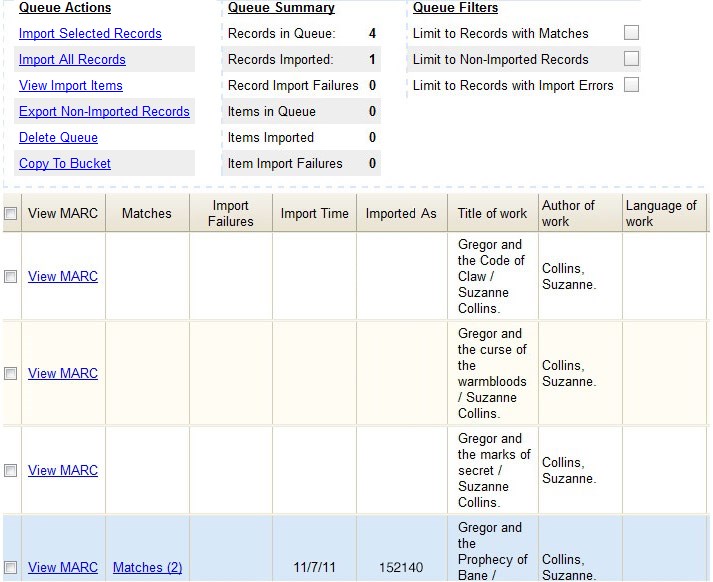
  18. You can confirm that the record was imported by using the value of the Imported As column by selecting the menu CatalogingRetrieve title by database ID and using the supplied Imported As number. Alternatively, you can search the catalog to confirm that the record was imported.

    Batch_Importing_MARC_Records14