| HomePrev | Chapter 39. Library closures | Next |
|---|
These dates are in addition to your regular weekly closed days. Both regular closed days and those entered in the Closed Dates Editor affect due dates and fines:
Closed dates do not affect the processing delays for Action/Triggers. For example, if your library has a trigger event that marks items as lost after 30 days, that 30 day period will include both open and closed dates.
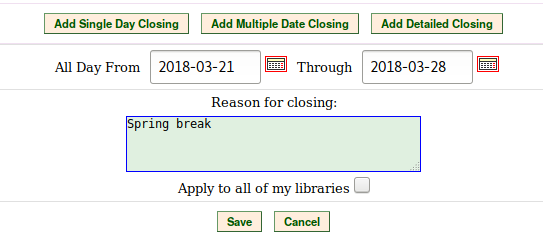
Click Apply to all of my libraries if your organizational unit has children units that will also be closed. This will add closed date entries to all of those child libraries.
By default, creating a closed date in a parent organizational unit does not also close the child unit. For example, adding a system-level closure will not also close all of that system’s branches, unless you check the Apply to all of my libraries box.
Now that your organizational structure is established, you can begin configuring permissions for the staff users of your Evergreen system.
If your closed dates include a portion of a business day, you should create a detailed closing.
To report a problem with this documentation or provide feedback, please contact the DIG mailing list.
© 2008-2015 GPLS and others. The Evergreen Project is a member of the Software Freedom Conservancy.
