| HomePrev | Chapter 134. Using the Public Access Catalog | Next |
|---|
Logging into your account from the online catalog:
Enter your Username and Password.
Click Login.
To view your account details, click one of the My Account tabs.
To start a search, enter a term in the search box at the top of the page and click Search!
If using a public computer be sure to log out!
To reset your password:
An email will be sent to the email addressed you have registered with your Evergreen library. You should click on the link included in the email to open the password reset page. Processing time may vary.
You will need to have a valid email account set up in Evergreen for you to reset your password. Otherwise, you will need to contact your library to have your password reset by library staff.
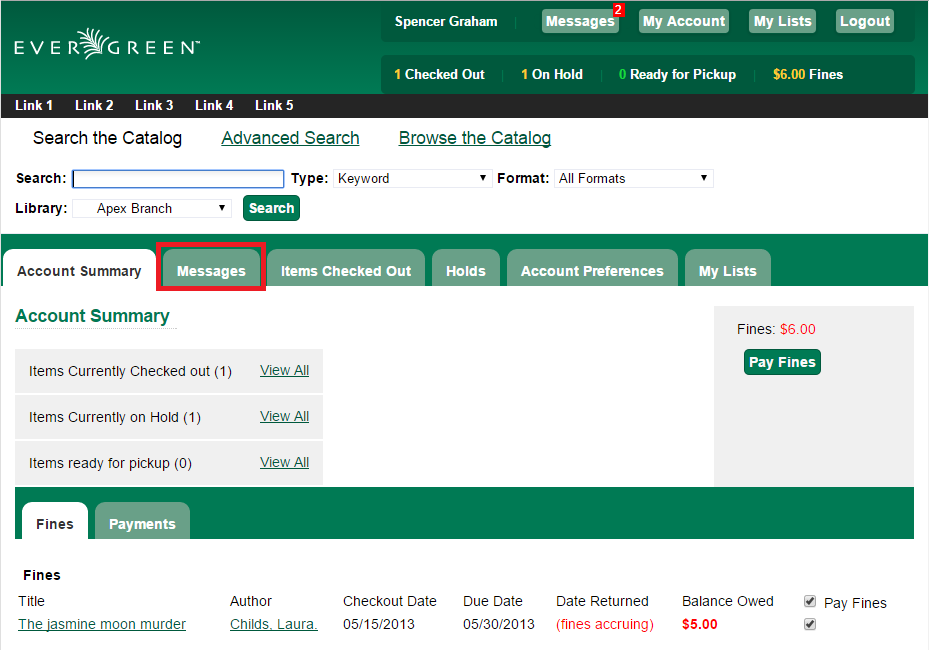
In the My Account → Account Summary page, you can see when your account expires and your total number of items checked out, items on hold, and items ready for pickup. In addition, the Account Summary page lists your current fines and payment history.
Users can manage items currently checked out, like renew specific items. Users can also view overdue items and see how many renewals they have remaining for specific item.
As of Evergreen version 2.9, sorting of selected columns is available in the Items Checked Out and Check Out History pages. Clicking on the appropriate column heads sorts the contents from "ascending" to "descending" to "no sort". (The "no sort" restores the original list as presented in the screen.) The sort indicator (an up or down arrow) is placed to the right of the column head, as appropriate.
Within Items Checked Out → Current Items Checked Out, the following column headers can be sorted: Title, Author, Renewals Left, Due Date, Barcode, and Call Number.
Within Items Checked Out → Check Out History, the following column headers can be sorted: Title, Author, Checkout Date, Due Date, Date Returned, Barcode, and Call Number
To protect patron privacy, the Check Out History will be completely blank unless the patron has previously opted in under the Account Preferences tab, in the Search and History Preferences area.
From My Account, patrons can see Items on Hold and Holds History and manage items currently being requested. In Holds → Items on Hold, the content shown can be sorted by clicking on the following column headers: Title, Author, and Format (based on format name represented by the icon).
Actions include:
Edit options include:
To edit items on hold:
To protect patron privacy, the Holds History will be completely blank unless the patron has previously opted in under the Account Preferences tab, in the Search and History Preferences area.
From here you can manage display preferences including your Personal Information, Notification Preferences, and Search and History Preferences. Additional static information, such as your Account Expiration Date, can be found under Personal Information.
For example:
Personal Information
Notification Preferences
Search and History Preferences
Turning off the Keep history of checked out items? or Keep history of holds? features will permanently delete all entries in the relevant patron screens. After this is unchecked, there is no way for a patron to recover those data.
After changing any of these settings, you must click Save to store your preferences.
The Patron Message Center provides a way for libraries to communicate with patrons through messages that can be accessed through the patron’s OPAC account. Library staff can create messages manually by adding an OPAC visible Patron Note to an account. Messages can also be automatically generated through an Action Trigger event. Patrons can access and manage messages within their OPAC account. See Circulation - Patron Record - Patron Message Center for more information on adding messages to patron accounts.
Viewing Patron Messages in the OPAC
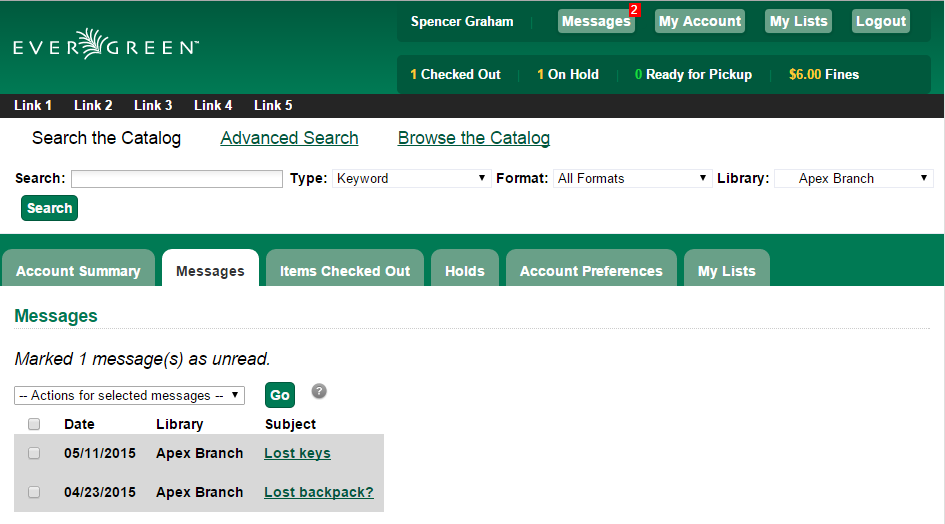
Patrons will see a new tab for Messages in their OPAC account, as well as a notification of Unread Messages in the account summary.
Patrons will see a list of the messages from the library by clicking on the Messages tab.
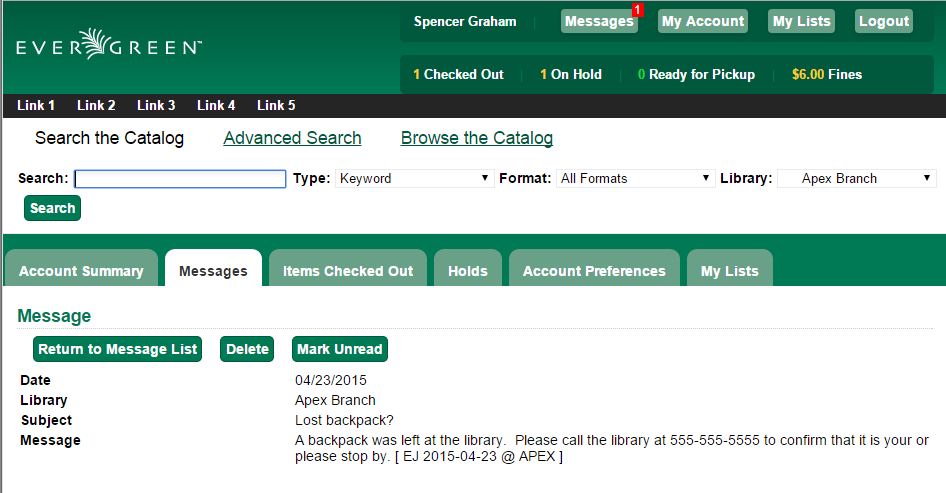
Patrons can click on a message Subject to view the message. After viewing the message, it will automatically be marked as read. Patrons have the options to mark the message as unread and to delete the message.
Patron deleted messages will still appear in the patron’s account in the staff client under Other → Message Center.
To report a problem with this documentation or provide feedback, please contact the DIG mailing list.
© 2008-2015 GPLS and others. The Evergreen Project is a member of the Software Freedom Conservancy.
