| HomePrev | Chapter 109. Holds Management | Next |
|---|
Holds can be cancelled at any time by staff or patrons. Before holds are captured, staff or patrons can suspend them or set them as inactive for a period of time without losing the hold queue position, activate suspended holds, change notification method, phone number, pick-up location (for multi-branch libraries only), expiration date, activation date for inactive holds, etc. Once a hold is captured, staff can change the pickup location and extend the hold shelf time if required.
Staff can edit holds in either patron’s records or the title records. Patrons can edit their holds in their account on the OPAC.
If you use the column picker to change the holds display from one area of the staff client (e.g. the patron record), it will change the display for all parts of the staff client that deal with holds, including the title record holds display, the holds shelf display, and the pull list display.
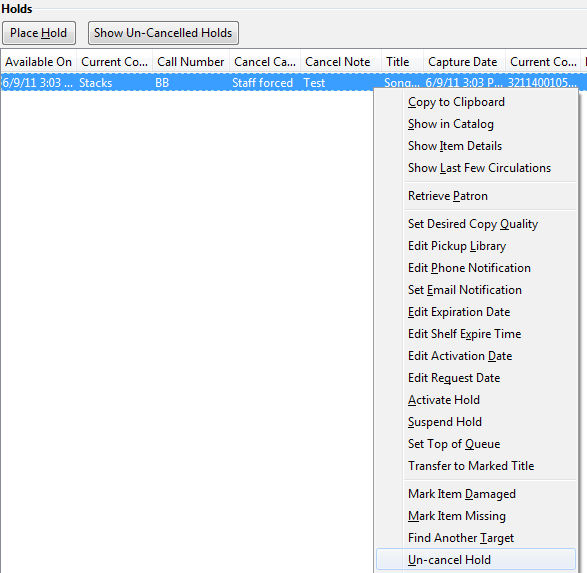
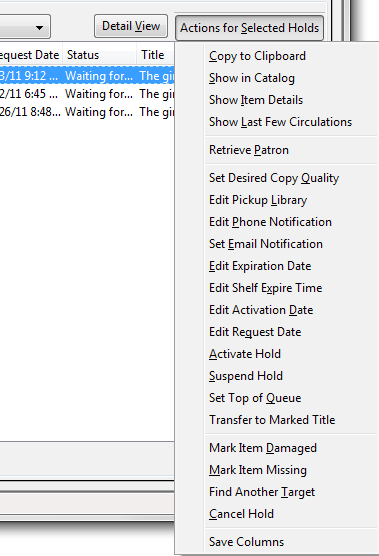
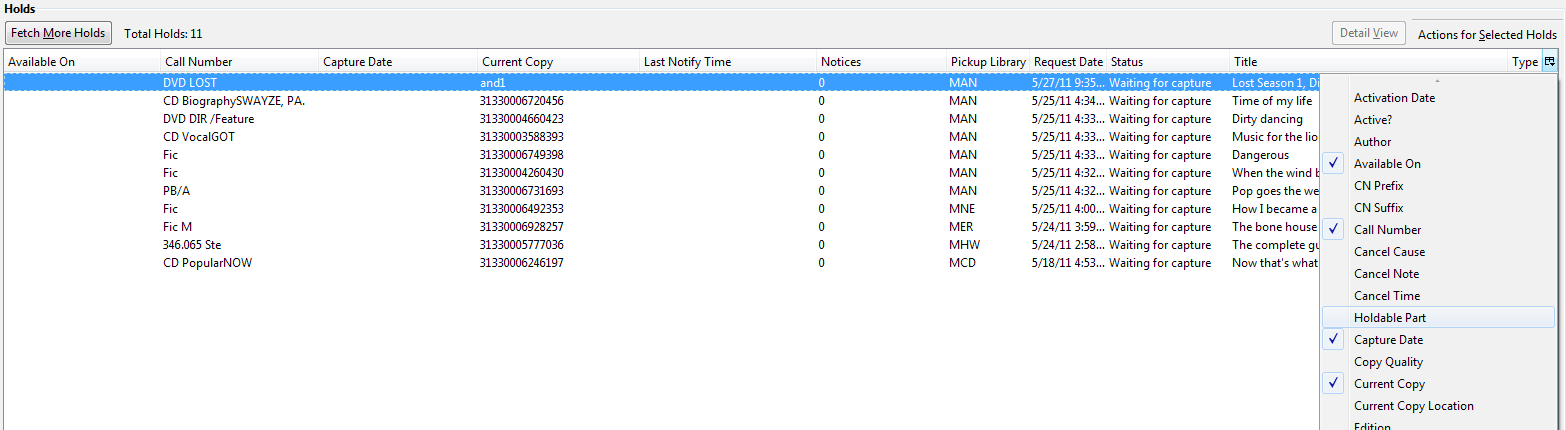
Highlight the hold record, then select Actions for Selected Holds.
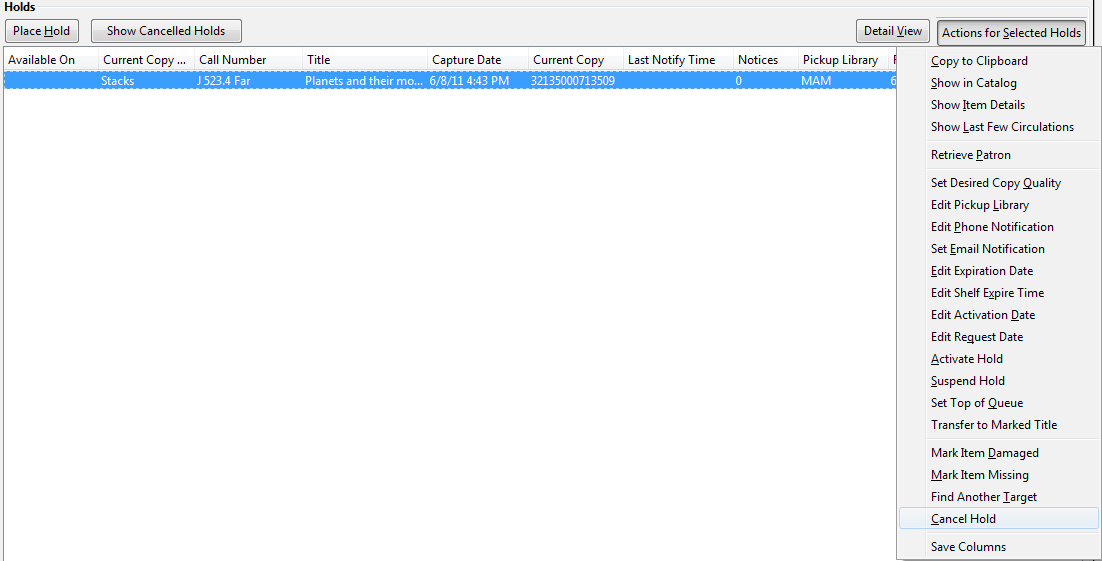
Manage the hold by choosing an action on the list.
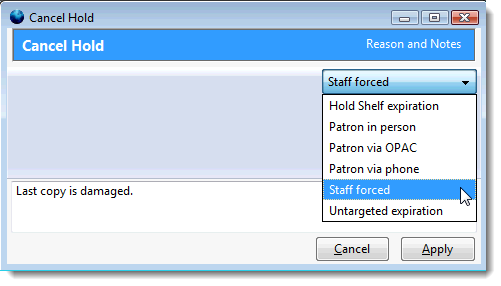
If you want to cancel the hold, click Cancel Hold from the menu. You are prompted to select a reason and put in a note if required. To finish, click Apply.
A captured hold with a status of On Hold Shelf can be cancelled by either staff or patrons. But the status of the item will not change until staff check it in.
If you want to suspend a hold or activate a suspended hold, click the appropriate action on the list. You will be prompted to confirm your action. Suspended holds have a No value in the Active? column.
Suspended holds will not be filled but its hold position will be kept. They will automatically become active on the activation date if there is an activation date in the record. Without an activation date, the holds will remain inactive until staff or a patron activates them manually.
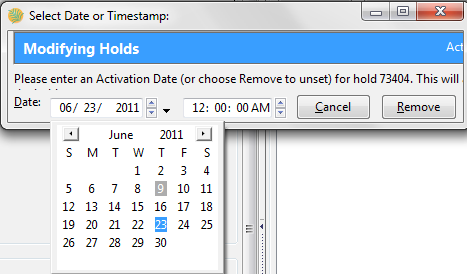
You may edit the Activation Date and Expiration Date by using the corresponding action on the Action for Selected Holds dropdown menu. You will be prompted to enter the new date. Use the calendar widget to choose a date, then click Apply. Use the Remove button to unset the date.
If you want to enable or disable phone notification or change the phone number, click Edit Phone Notification. You will be prompted to enter the new phone number. Make sure you enter a valid and complete phone number. The phone number is used for this hold only and can be different from the one in the patron account. It has no impact on the patron account. If you leave it blank, no phone number will be printed on the hold slip.

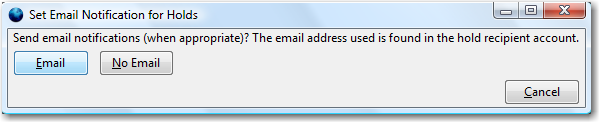
If you want to enable or disable email notification for the hold, click Set Email Notification. Click Email or No Email on the prompt screen.
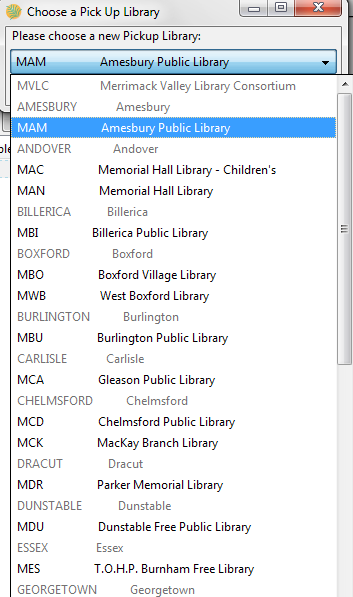
Pickup location can be changed by clicking Edit Pickup Library. Click the dropdown list of all libraries and choose the new pickup location. Click Done.
Staff can change the pickup location for holds with in-transit status. Item will be sent in transit to the new destination. Staff cannot change the pickup location once an item is on the holds shelf.
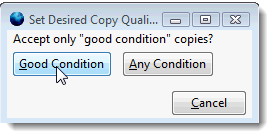
The item’s physical condition is recorded in the copy record as Good or Mediocre in the Quality field. You may request that your holds be filled with copies of good quality only. Click Set Desired Copy Quality on the Actions for Selected Holds list. Make your choice in the pop-up window.
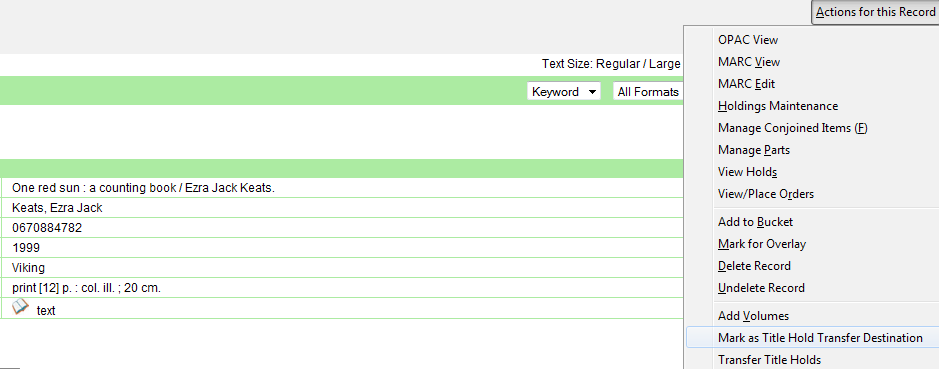
Holds on one title can be transferred to another with the hold request time preserved. To do so, you need to find the destination title and click Actions for this Record → Mark as Title Hold Transfer Destination.
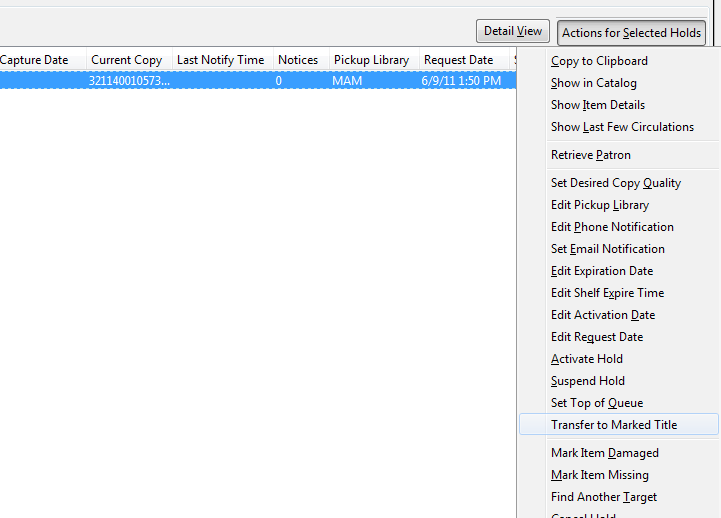
Select the hold you want to transfer. Click Actions for Selected Holds → Transfer to Marked Title.
Cancelled holds can be displayed. Click the Show Cancelled Holds button on the Holds screen.

You can un-cancel holds.
Based on your library’s setting, hold request time can be reset when a hold is un-cancelled.
You can view details of a hold by selecting a hold then clicking the Detail View button on the Holds screen.

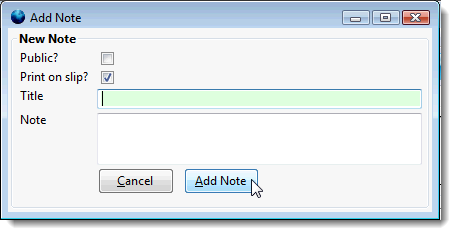
You may add a note to a hold in the Detail View.
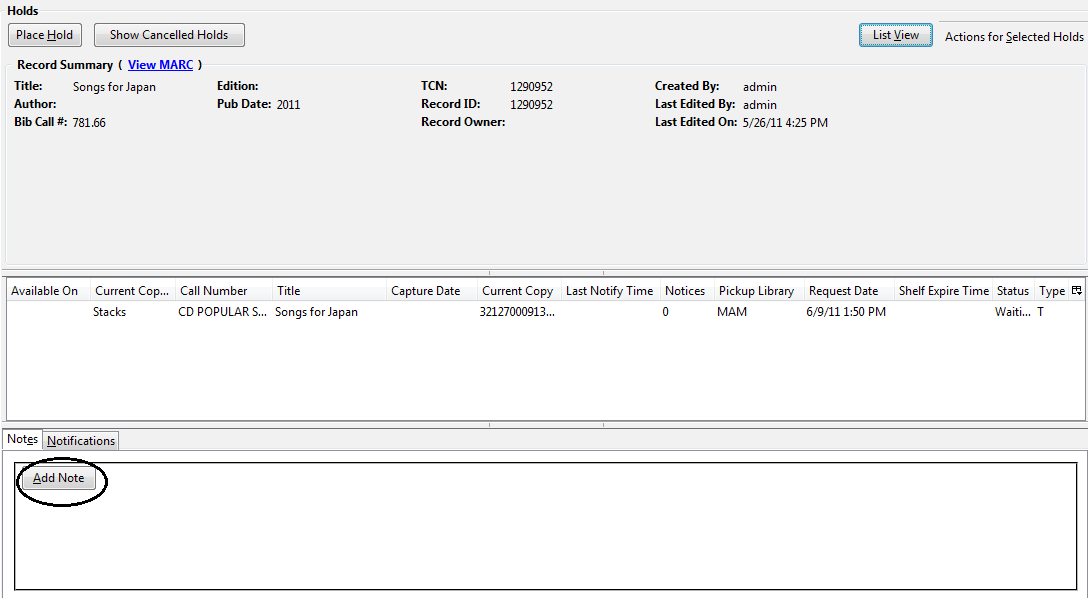
Notes can be printed on the hold slip if the Print on slip? checkbox is selected. Key in the message then click Add Note.
Using the Column Picker, you can display Queue Position and Total number of Holds.

Click Actions for this Record → View Holds.
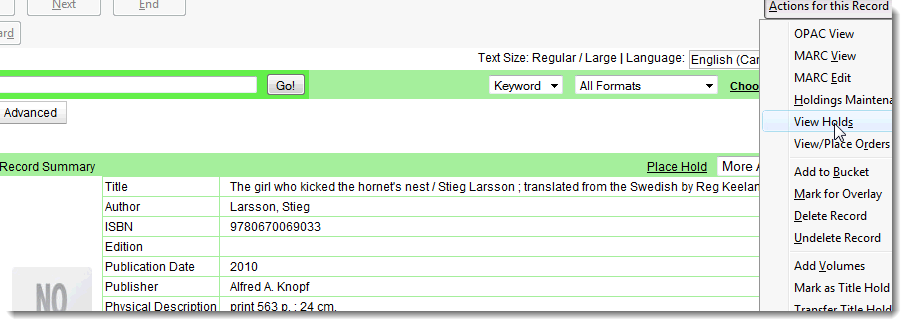
All holds on this title to be picked up at your library are displayed. Use the Filter checkbox and Pickup Library to view holds to be picked up at other libraries.

Highlight the hold you want to edit. Choose an action from the Actions for Selected Holds menu. For more information see the Actions for Selected Holds section.
Holds need to be retargeted whenever a new item is added to a record, or after some types of item status changes, for instance when an item is changed from On Order to In Process. The system does not automatically recognize the newly added items as available to fill holds.
There are usually four statuses a hold may have: Waiting for Copy, Waiting for Capture, In Transit and Ready for Pickup.
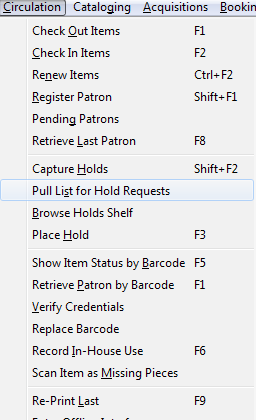
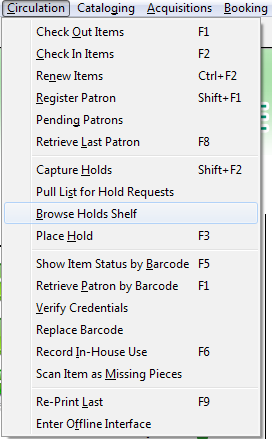
To retrieve your Holds Pull List, select Circulation → Pull List for Hold Requests.
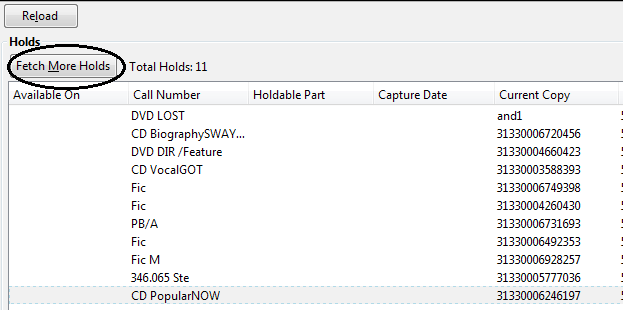
The Holds Pull List is displayed. You may re-sort it by clicking the column labels, e.g. Title. You can also add fields to the display by using the column picker.
Column adjustments will only affect the screen display and the CSV download for the holds pull list. It will not affect the printable holds pull list.
The maximum number of holds initially displayed on the pull list is about 100. Use Fetch More Holds to retrieve more records. You may have to click Reload for those records to appear in the display.
The following options are available for printing the pull list:
Save List CSV to File – This option is available from the List Actions button and saves all fields in the screen display to a CSV file. This file can then be opened in Excel or another spreadsheet program. This option provides more flexibility in identifying fields that should be printed.
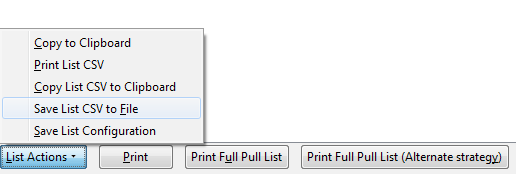
With the CSV option, if you are including barcodes in the holds pull list, you will need to take the following steps to make the barcode display properly: in Excel, select the entire barcode column, right-click and select Format Cells, click Number as the category and then reduce the number of decimal places to 0.
The Holds Pull List is updated constantly. Once an item on the list is no longer available or a hold on the list is captured, the items will disappear from the list. The Holds Pull List should be printed at least once a day.
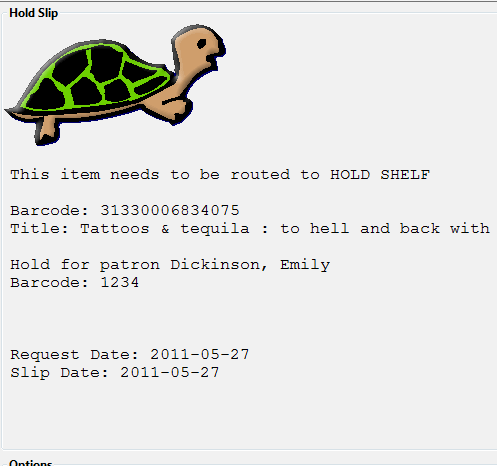
Holds can be captured when a checked-out item is returned (checked in) or an item on the Holds Pull List is retrieved and captured. When a hold is captured, the hold slip will be printed and if the patron has chosen to be notified by email, the email notification will be sent out. The item should be put on the hold shelf.
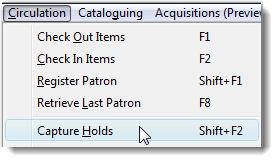
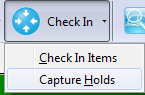
To capture a hold, select Circulation → Capture Holds; click Check In → Capture Holds on the circulation toolbar; or hit Shift-F2.
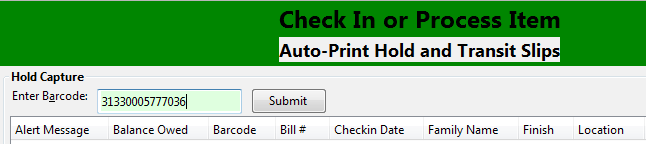
Scan or type barcode and click Submit.
The following hold slip is automatically printed. (This slip will not display on the Capture Holds screen, but will display on a Check In screen not set to automatically print slips.)
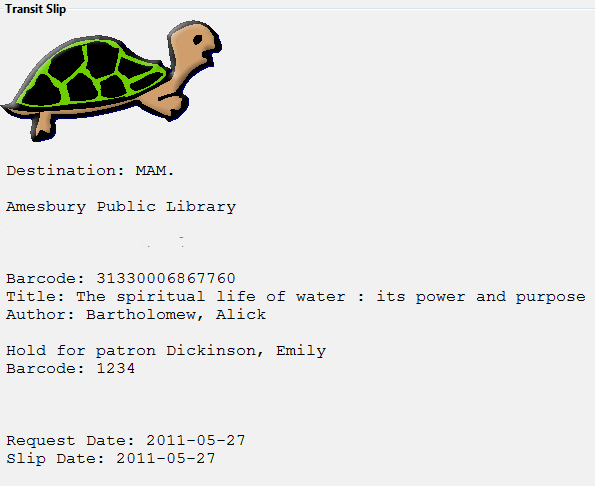
If the item should be sent to another location, a hold transit slip will be printed. (This slip will not display on the Capture Holds screen, but may display on a Check In screen that is not set to automatically print slips.)
If a patron has an OPAC/Staff Client Holds Alias in his/her account, it will be used on the hold slip instead of the patron’s name. Holds can also be captured on the Circulation → Check In Items screen where you have more control over automatic slip printing.
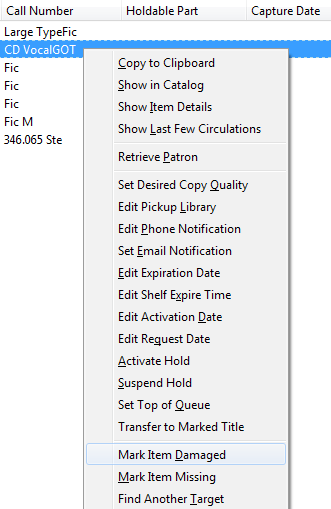
If an item on the holds pull list is missing or damaged, you can change its status directly from the holds pull list.
From the Holds Pull List, right-click on the item and either select Mark Item Missing or Mark Item Damaged.
In Evergreen, patrons can set up their default holds notification method in the Account Preferences area of My Account. Staff cannot set these preferences for patrons; the patrons must do it when they are logged into the public catalog.
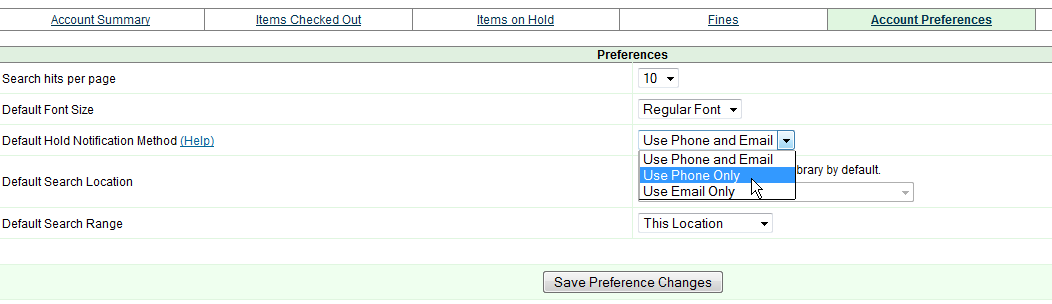
The “Default Phone Number” option is the default for those users who have not yet set a preference.
Patrons with a default notification preference for phone will see their phone number at the time they place a hold. The checkboxes for email and phone notification will also automatically be checked.
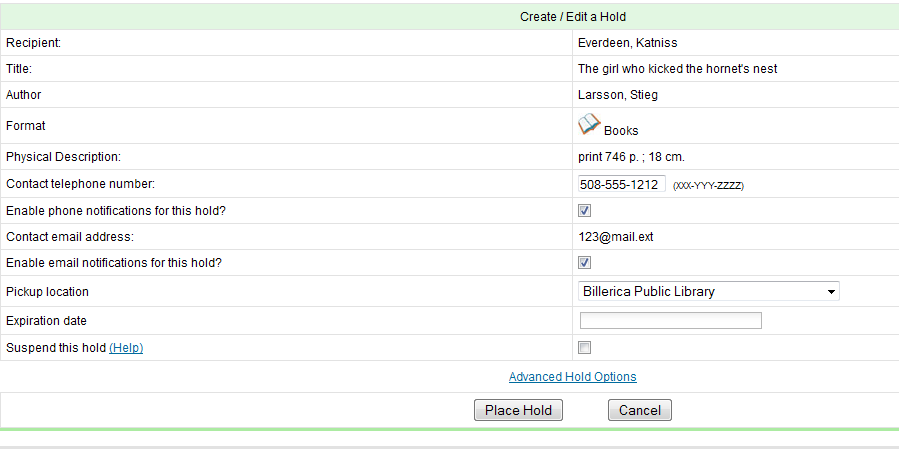
The patron can remove these checkmarks at the time they place the hold or they can enter a different phone number if they prefer to be contacted at a different number. The patron cannot change their e-mail address at this time.
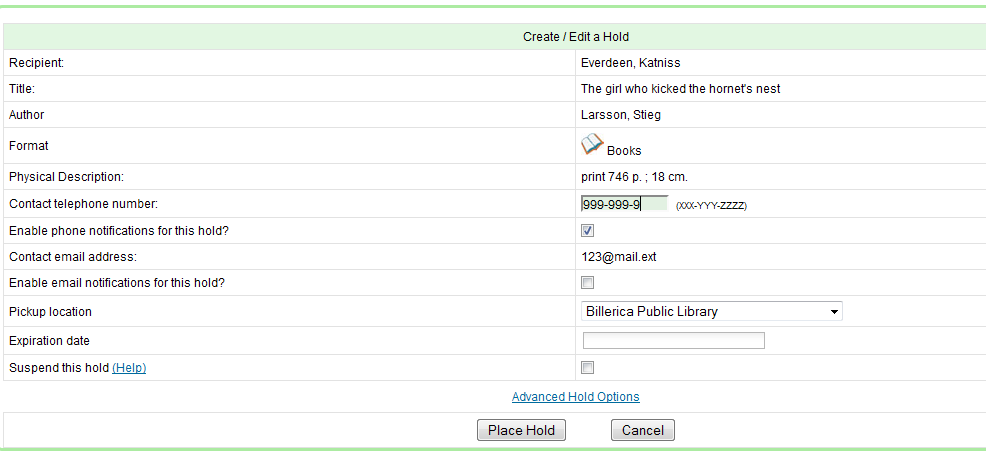
If the patron changes their contact telephone number when placing the hold, this phone number will display on the holds slip. It will not necessarily be the same phone number contained in the patron’s record.
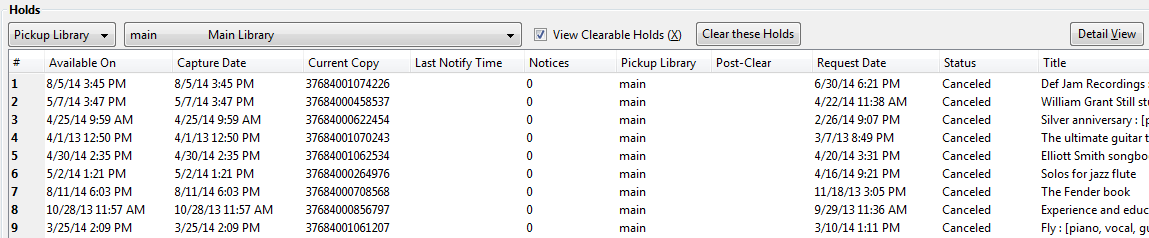
Items with Ready-for-Pickup status are on the Holds Shelf List. The Holds Shelf List can help you manage items on the holds shelf. To see the holds shelf list, select Circulation → Browse Holds Shelf.
The Holds Shelf List is displayed. Note the Actions for Selected Holds are available, as in the patron record.
You can cancel stale holds here.
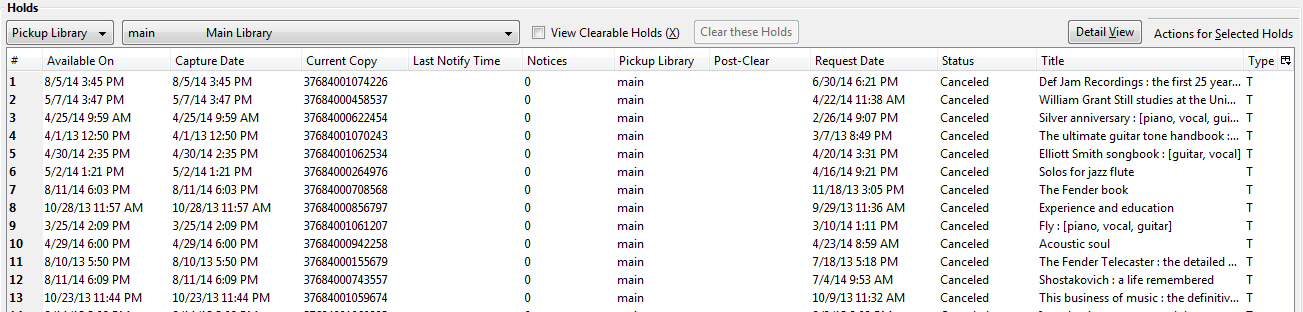
Use the column picker to add and remove fields from this display. Two fields you may want to display are Shelf Expire Time and Shelf Time.
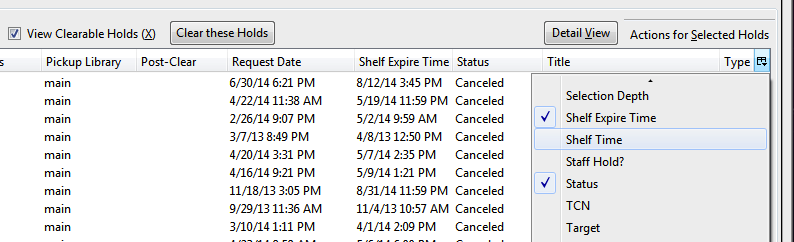
The Clear These Holds button is lit up. Click it and the expired holds will be canceled.
If you cancel a ready-for-pickup hold, you must check in the item to make it available for circulation or trigger the next hold in line.
Hold shelf expire time is inserted when a hold achieves on-hold-shelf status. It is calculated based on the interval entered in Local Admin → Library Settings → Default hold shelf expire interval.
The clear-hold-shelf function cancels shelf-expired holds only. It does not include holds canceled by patron. Staff needs to trace these items manually according to the hold slip date.
To report a problem with this documentation or provide feedback, please contact the DIG mailing list.
© 2008-2015 GPLS and others. The Evergreen Project is a member of the Software Freedom Conservancy.
