| HomePrev | Part XI. Circulation | Next |
|---|
Table of Contents
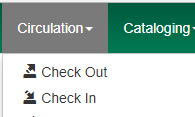
1) To check out an item click Check Out Items from the Circulation and Patrons toolbar, or select Circulation → Check Out.
2) Scan or enter patron’s barcode and click Submit if entering barcode manually. If scanning, number is submitted automatically.

3) Scan or enter item barcode manually, clicking Submit if manual.

4) Due date is now displayed.

5) When all items are scanned, click the Done button to generate slip receipt or to exit patron record if not printing slip receipts.
1) Go to patron’s Check Out screen by clicking Circulation → Check Out Items.
2) Scan the item barcode.
3) At prompt, enter the required information click Precat Checkout.
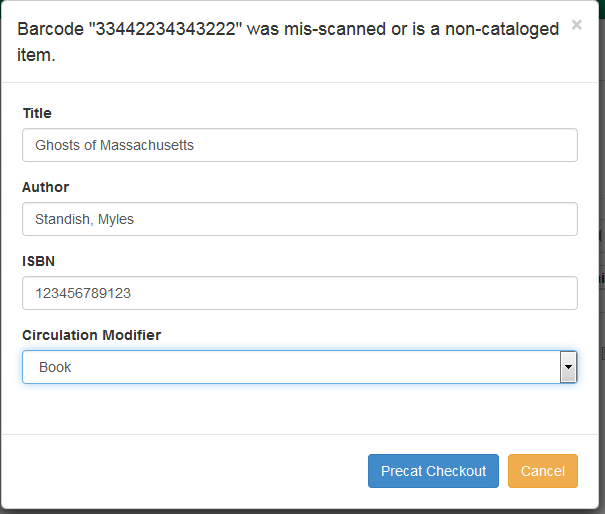
On check-in, Evergreen will prompt staff to re-route the item to cataloging.
This screen does not respond to the enter key or carriage return provided by a barcode scanner when the cursor is in the ISBN field. This behavior prevents pre-cataloged items from being checked out before you are done entering all the desired information.
Circulation periods are pre-set. When items are checked out, due dates are automatically calculated and inserted into circulation records if the Specific Due Date checkbox is not selected on the Check Out screen. The Specific Due Date checkbox allows you to set a different due date to override the pre-set loan period.
Before you scan the item, select the Specific Due Date checkbox. Enter the date in yyyy-mm-dd format. This date applies to all items until you change the date, de-select the Specific Due Date checkbox, or quit the patron record.

This feature allows patrons to receive checkout receipts through email at the circulation desk and in the Evergreen self-checkout interface. Patrons need to opt in to receive email receipts by default and must have an email address associated with their account. Opt in can be staff mediated at the time of account creation or in existing accounts. Patrons can also opt in directly in their OPAC account or through patron self-registration. This feature does not affect the behavior of checkouts from SIP2 devices.
When a patron has opted to receive email checkout receipts by default, an envelope icon representing email will appear next to the receipt options in the Check Out screen. A printer icon representing a physical receipt appears if the patron has not opted in to the default email receipts.
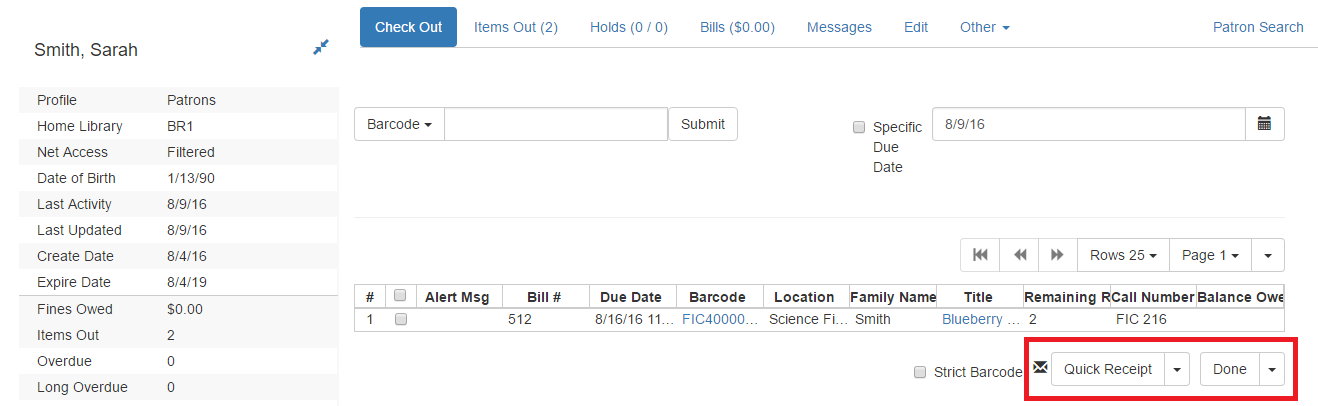
Staff can click Quick Receipt and the default checkout receipt option will be triggered—an email will be sent or the receipt will print out. The Quick Receipt option allows staff to stay in the patron account after completing the transaction. Alternatively, staff can click Done to trigger the default checkout receipt and close out the patron account. By clicking on the arrow next to the Quick Receipt or Done buttons, staff can select which receipt option to use, regardless of the selected default. The email receipt option will be disabled if the patron account does not have an email address.
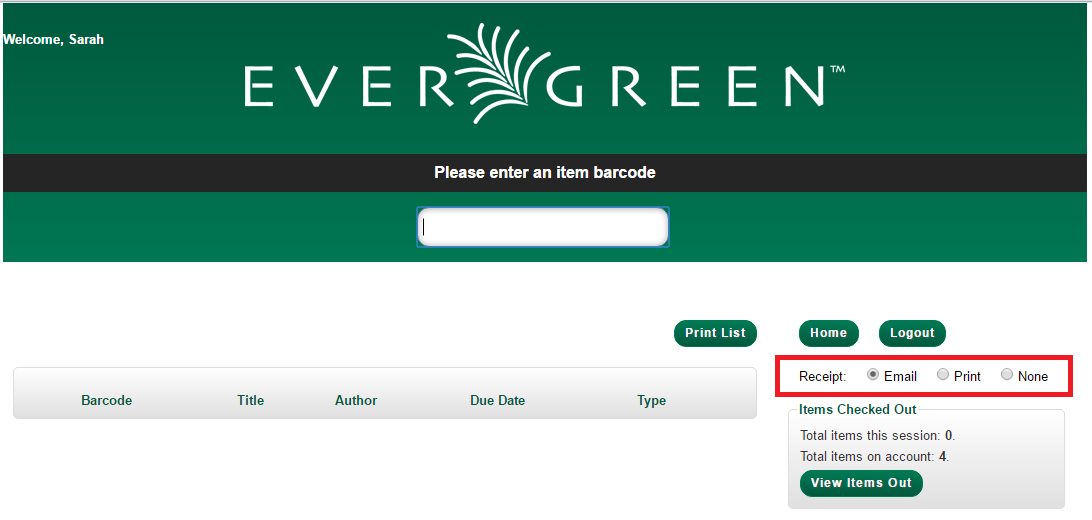
In the Self Checkout interface, patrons will have the option to select a print or email checkout receipt, or no receipt. The radio button for the patron’s default receipt option will be selected automatically in the interface. Patrons can select a different receipt option if desired. The email receipt radio button will be disabled if there is no email address associated with the patron’s account.
Staff Mediated Opt In At Registration
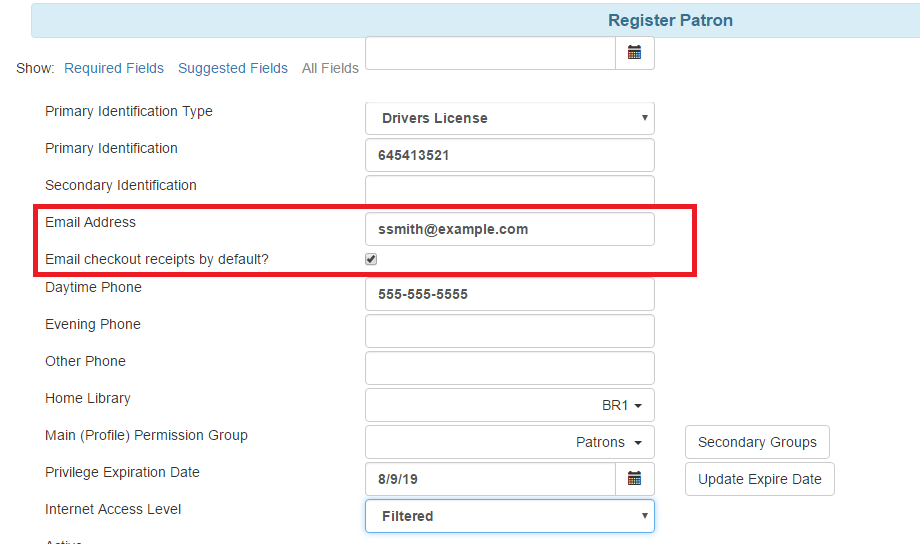
Patrons can be opted in to receive email checkout receipts by default by library staff upon the creation of their library account. Within the patron registration form, there is a new option below the Email Address field to select Email checkout receipts by default?. Select this option if the patron wants email checkout receipts to be their default. Save any changes.
Staff Mediated Opt In After Registration
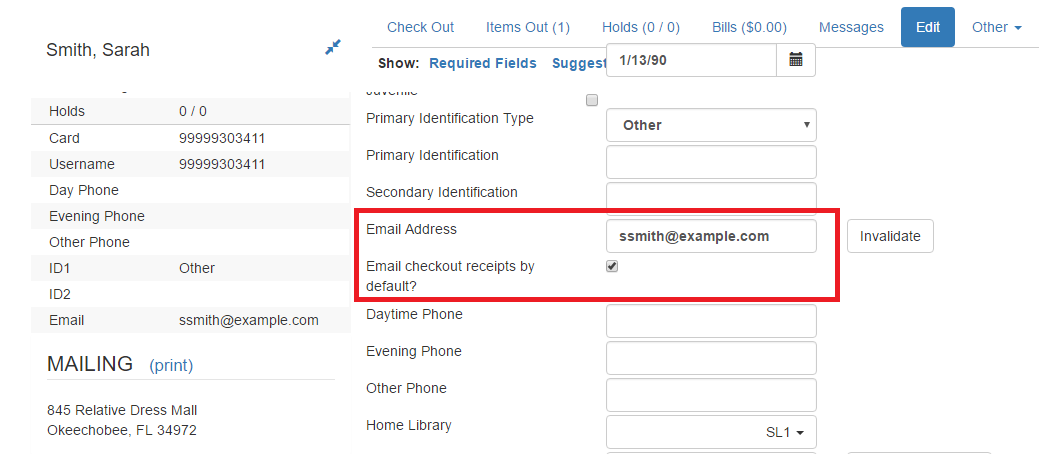
Staff can also select email checkout receipts as the default option in a patron account after initial registration. Within the patron account go to Edit and select Email checkout receipts by default?. Make sure the patron also has an email address associated with their account. Save any changes.
Patron Opt In – Self-Registration Form
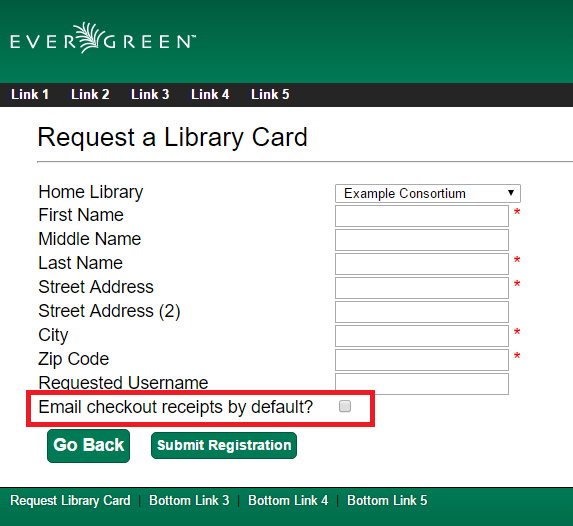
If your library offers patrons the ability to request a library card through the patron self-registration form, they can select email checkout receipts by default in the initial self-registration form:
Patron Opt In - OPAC Account
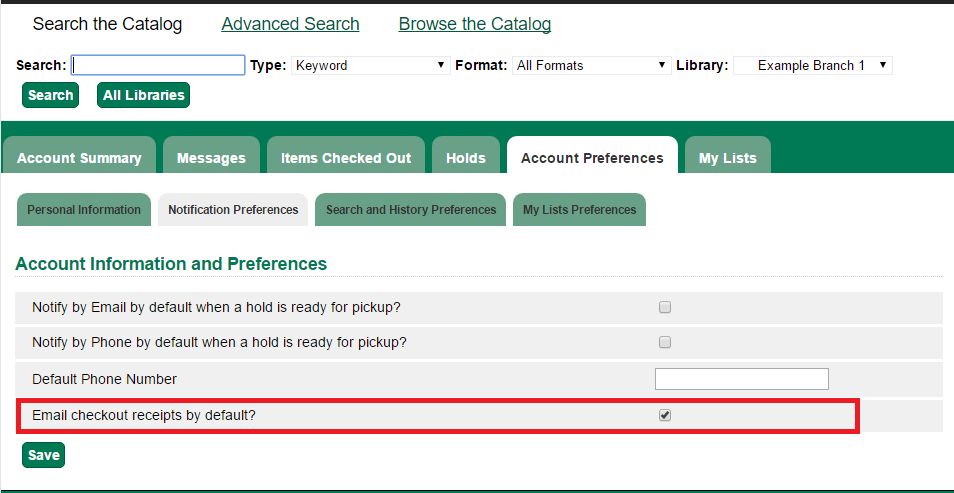
Patrons can also opt in to receive email checkout receipts by default directly in their OPAC account. After logging in, patrons can go to Account Preferences→Notification Preferences and enable Email checkout receipts by default? and click Save.
Email checkout receipts will be sent out through a Notifications/Action Trigger called Email Checkout Receipt. The email template and action trigger can be customized by going to Administration→Local Administration→Notifications/Action Trigger→Email Checkout Receipt.
To report a problem with this documentation or provide feedback, please contact the DIG mailing list.
© 2008-2015 GPLS and others. The Evergreen Project is a member of the Software Freedom Conservancy.
